What You'll Need
- Ring Video Doorbell (2nd Gen)
- Included mounting hardware and screws
- Drill with appropriate drill bits
- Screwdriver
- Level (optional but recommended)
- Smartphone or tablet
- Strong WiFi signal at installation location
Step 1: Charge Your Device
Time Required: 2-4 hours
- Remove the Ring doorbell from packaging
- Locate the removable battery (press the release tab)
- Connect the included USB cable to the battery
- Plug into a standard USB charger or computer
- Wait for the battery indicator light to turn solid green (fully charged)
Pro Tip: Charge overnight before installation day to ensure full power.
Step 2: Download the Ring App & Create Account
Time Required: 5-10 minutes
- Download the "Ring" app from the App Store (iOS) or Google Play Store (Android)
- Create a new Ring account or sign in to existing account
- Tap "Set Up a Device" in the app
- Select "Doorbells" then choose your specific Ring model
- Follow the in-app setup wizard
Important: Keep your WiFi password handy – you'll need it during setup.
Step 3A: Battery Installation (Most Common)
Time Required: 10-15 minutes
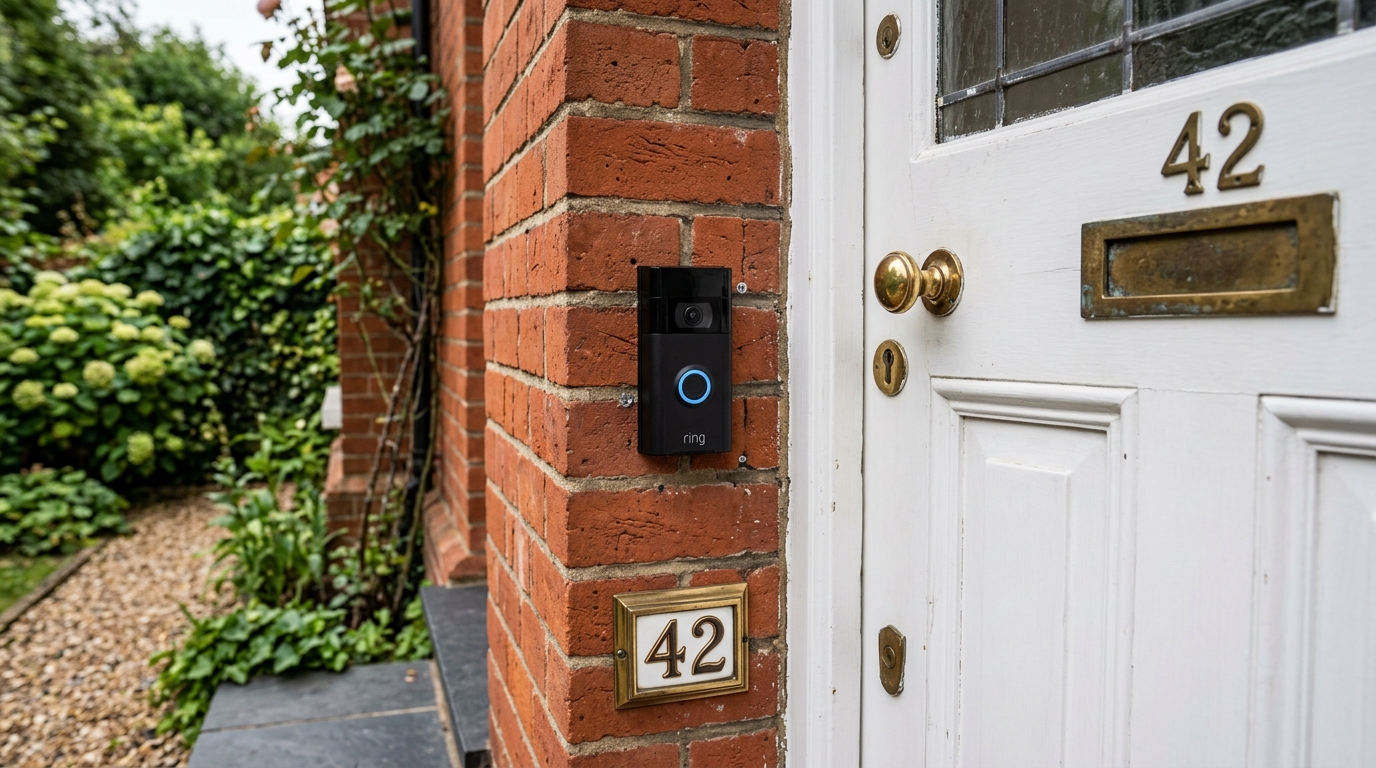
- Choose your mounting location (ideally 48 inches from ground level)
- Use the included paper template to mark screw holes
- Ensure the location has strong WiFi signal (test with your phone)
- Check the viewing angle covers your desired area
Pre-Installation Checklist
- ✓ Location gets good WiFi signal
- ✓ Mounting surface is solid (brick, wood, etc.)
- ✓ Height is appropriate (42-48 inches recommended)
- ✓ Viewing angle covers entrance area
Step 3B: Wired Installation (UK)
Time Required: 1-2 hours (plus electrician consultation)
⚠️ SAFETY WARNING
Working with mains electricity can be dangerous. We strongly recommend using a qualified electrician for wired installations, especially for new circuits or transformer work.
Voltage Requirements
- Ring doorbell needs 8-24V AC power
- UK mains is 230V – requires a transformer to step down voltage
- Transformer must be BS EN certified for UK use
When You MUST Use an Electrician
- Installing new transformer or circuits
- Connecting to mains electricity (230V)
- No existing doorbell wiring
- Upgrading consumer unit connections
- If you're unsure about any electrical work
For Existing Low-Voltage Systems Only
Safety First:
- Turn off power at consumer unit
- Use voltage tester to confirm power is off
- Never work on live circuits
Installation Steps
- Check compatibility: Verify existing transformer is 8-24V AC
- Disconnect old doorbell: Label the two low-voltage wires
- Connect Ring wires: Attach to Ring's terminals (polarity doesn't matter)
- Test system: Turn power back on and test functionality
Professional Installation Benefits
- Ensures UK Building Regulations compliance
- Provides electrical safety certificates
- Proper earthing and RCD protection
Typical UK Costs (2025): Transformer replacement £80-150, New circuit £150-300
Legal Disclaimer: This guide is for information only. Always consult a qualified electrician for mains electrical work. Improper installation can cause fire, electrocution, or death.
- Drill pilot holes using the marked template
- Attach the mounting bracket with included screws
- For angled mounting, use the included wedge kit
- Ensure bracket is level and secure
Safety Tip: Wear safety glasses when drilling, especially into brick or masonry.
Step 4: Connect to WiFi & Test
Time Required: 5-10 minutes
- Insert the charged battery into the Ring doorbell
- Attach the doorbell to the mounting bracket (it should click into place)
- Open the Ring app and continue the setup process
- Connect to your home WiFi network when prompted
- Test the doorbell button and verify you receive notifications
- Test two-way audio by speaking through the app
- Adjust motion detection settings in the app
Final Testing Checklist
- ✓ Doorbell button press triggers notification
- ✓ Motion detection works properly
- ✓ Video quality is clear (day and night)
- ✓ Two-way audio works both directions
- ✓ WiFi connection is stable
Troubleshooting Common Issues
Poor WiFi Signal
- Move your router closer or add a WiFi extender
- Check for interference from other devices
Motion Detection Too Sensitive
- Adjust motion zones in the Ring app
- Lower motion sensitivity settings
Battery Drains Quickly
- Reduce motion detection frequency
- Check for high-traffic areas causing constant alerts
- Consider wired installation for heavy-use locations